How to apply your removable vinyl sticker
Follow the instructions below to apply our removable vinyl stickers to any smooth surface! Alternatively, download these instructions as a PDF. If you’ve gotten maximum enjoyment from your sticker and you’d like to remove it, simply remove it with a plastic card.
Make sure you have the following
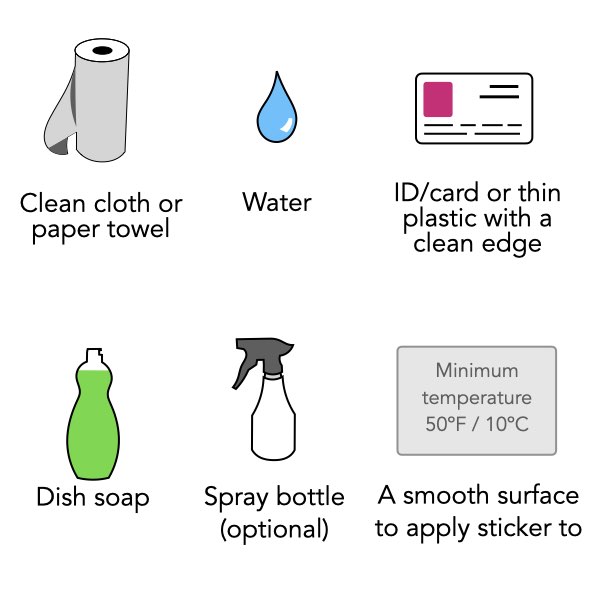
Before you begin, make sure you have the following:
- Clean cloth or paper towel
- Water
- A plastic card (ex: ID, credit card) or thin plastic with a clean edge
- Dish soap
- Spray bottle (optional)
- A smooth surface where you’ll apply the sticker
Step 1. Clean your work surface

Clean your work surface of any dust or other small particles that could get between the sticker and the application surface.
Step 2. Clean the application surface

Clean the surface that you’re applying sticker to. Make sure that the application surface is not too cold – it should be a minimum of 50ºF (10ºC).
Step 3. Clean the sticker surface

Wipe the top surface of the sticker with a dry towel to remove any dust or particles from the printing process so they don’t end up under the sticker.
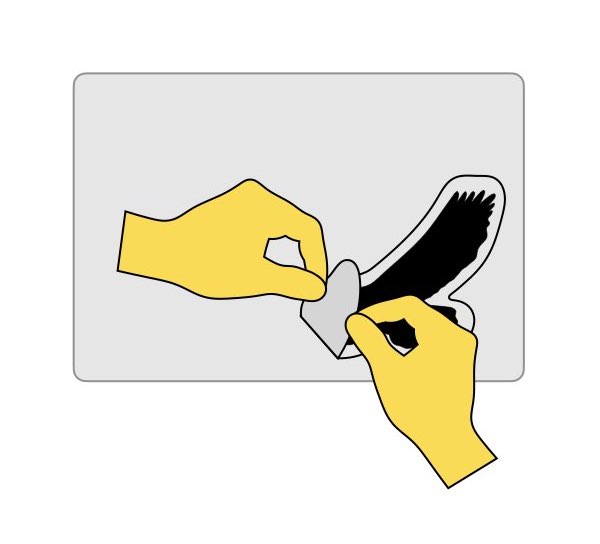
Step 4. Remove the clear vinyl around the sticker

Before you remove the sticker, remove the clear vinyl around the sticker. This will give you a large clear surface to adhere the sticker to if you don’t like where you put it the first time. This will also make it easier to remove the sticker from the backing. Be sure that the surface under the removed vinyl stays clean.
Step 5. Peel the sticker up from the backing paper

Peel the sticker from the backing. You can bend the backing slightly to get under the surface of the sticker but don’t fold the backing too much. Place the sticker upside down on your work surface away from the backing paper.
Step 6. Wet the application surface and back of sticker

Spray the application surface and the back of the sticker with water mixed with one drop dish soap. This will make it easier to position the sticker on the surface and push out bubbles. If you don’t have a spray bottle, sprinkle the water with your hands. Don’t get the backing paper wet in case you need to re-apply your sticker (Steps 11-14).
If your application surface is not waterproof you can apply your sticker to a dry surface. However, you won’t be able to refine the position sticker on the surface once applied and it will be harder to remove any potential bubbles.
If you’re not happy with where you’ve put the sticker, you can sometimes get it up without damaging it and reapply it. This works best if done immediately after application. Only try Steps 11-14 if you really don’t like where you’ve put your sticker.
Step 7. Gently apply the sticker to the surface

Apply the sticker to the surface gently. Don’t press it down or force the bubbles out from under the sticker yet.
If you’re applying the sticker to a dry surface, only apply the center of the sticker to the surface and skip to Step 9.
Step 8. Refine the position of the sticker

Reposition and rotate the sticker within the wet area to its final position and orientation. Be sure that you like the position and orientation before proceeding. It’s not always possible to get the sticker off without damaging it if you want to put it somewhere else.
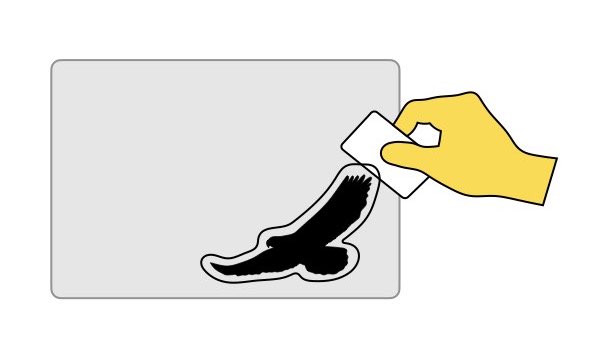
Step 9. Smooth the sticker surface

Use the plastic card or thin plastic to wipe the surface of the sticker and remove any bubbles between the surface and the sticker. Start from the center and work your way out in several directions (ex: up, to the left, down, to the right) until you’ve pushed out all the bubbles.
Step 10. Dry the sticker and application area

If you’re happy with the sticker’s placement, wipe the application area with the towel to dry!
Don’t forget to share your work of art and tag us!
Step 11. Make sure the backing paper is clean

Make sure the backing paper that the sticker was on previously is clean by wiping it with a dry towel.
Step 12. Peel up an edge of the sticker

Use a razor or the plastic card to very carefully peel up the edge of the sticker. Use a continuous lifting motion as you get under the sticker so that you don’t crease or fold the edge of the sticker; the edges can be easily damaged.
Step 13. Peel up the rest of the sticker
Once you get a small portion of the sticker up from the surface, carefully pull up the rest of the sticker. Grab as much of the sticker as possible as you pull up so that you do not stretch or tear the sticker as you remove it.
Step 14. Place the sticker on the backing paper
You can now place the sticker back onto the backing with the sticky side contacting the backing paper (how it was in Step 5). Then repeat Steps 5-10 to reapply the sticker to the same surface or a different surface.
When you’ve gotten maximum enjoyment from your sticker, you can easily remove it.
Removing your sticker
Use a razor or plastic card to peel the sticker from the surface. The sticker will come off in one piece. Any residue left over is not permanent and can be removed with soap and water or alcohol.